Relief sculpture is an artmaking practice that dates back 20,000 years. To make a relief, artists start with a flat base made of wood, stone or metal and carve away material until a final design stands out against the background. Reliefs are found all over the world. They were most often included on architectural sites and buildings as decoration. Over time, relief sculpture became more popular as individual, decorative works of art. What decorative elements do you see in this relief?

This work of art shows a portrait — a work of art that depicts a person. Prince Alexander Mikhailovich Belosselsky-Belozersky was an important member of a Russian noble family that created an amazing art collection. Relief portraits typically show their subject in profile, which means only half of their face is showing. This work of art is unique because it does not show its subject in profile. While his face is turned slightly, you can still see both sides of it. How does the artist use different lines and textures to create a portrait in this relief?
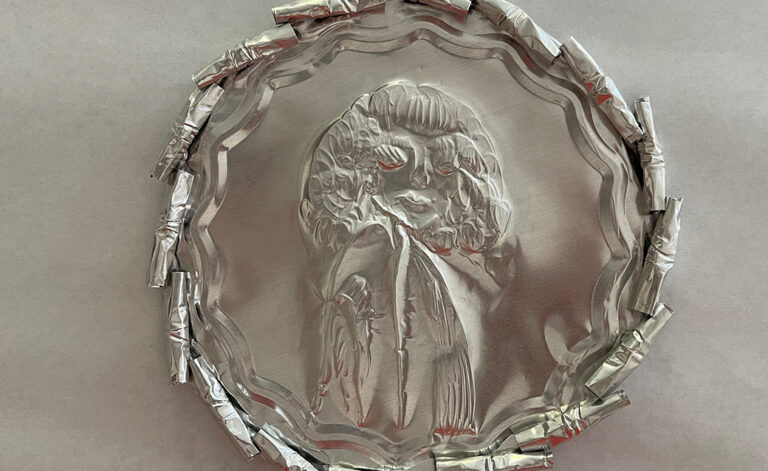
In this activity, you will use a pie tin to create a relief portrait.

For this activity you will need:
- pie tin
- scissors
- chopstick
- sharpie
- towel
To make your pie tin portrait:

Place the pie tin on a hard surface like a table. If necessary, use the handle of your scissors to press and rub out any text or designs in the bottom of the pie tin so you have a flat surface.

 Cut off the top rim of the pie tin. Then make cuts about an inch apart all the way around the sides to create a border. Try making these cuts on a diagonal so the sides have a triangle pattern. Press the sides down flat so the pie tin looks like a sun.
Start drawing a portrait with a permanent marker. Who will you draw? How will you have them pose? What features of the person are important to include?

Place a towel underneath the flattened pie tin and use a chopstick to trace over your drawing. Gently press to create an indent. This is how you make a relief!

Flip over the tin and roll each side piece into a curl with the chopstick to create a border around your portrait.

Tip: To add more decorative elements or textures, flip the pie tin back over, draw these designs and press with the chopstick. They will appear in relief when you turn your pie tin portrait over once again!